Invite your team and choose their roles
Each person who helps run your studio gets their own sign-in. Their role decides which screens they see, so instructors see their classes and the front desk sees members, check-in, memberships and gift cards, without Settings, Sales or Reports.
On this page 5 sections
Invite someone#
Open Team
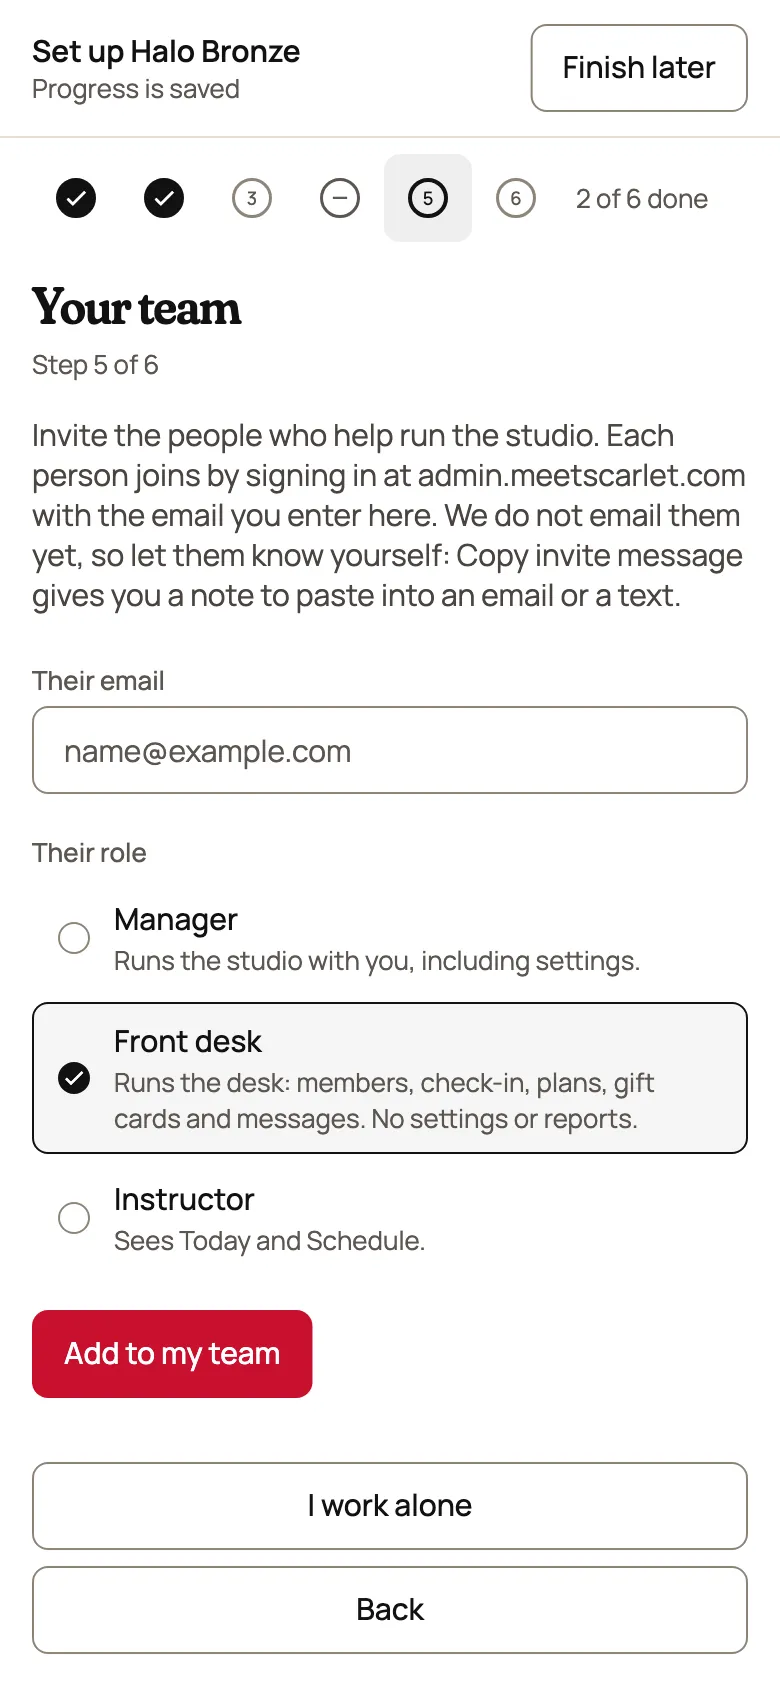
Open Settings, choose the Team page and use Invite someone. While you're still setting up, it's also a step in setup: open the Ready for members checklist on Today and go to Your team under Optional.
Add their email and role
Type their email, choose a role, then Create invitation (in setup the button says Add to my team). Add as many people as you need.
Tell them
Scarlet doesn't email them yet, so let them know yourself: under Invited, not joined yet in Settings, choose Copy invite message next to their email and paste it into an email or a text. It names your studio, their role, the address to sign in with and when the invitation ends. They go to admin.meetscarlet.com, and sign in or create an account with that same email. If the studio doesn't open straight away, they choose Check for an invitation.
Until they sign in, they're listed under Invited, not joined yet in Settings, with the date the invitation ends. An invitation nobody uses ends after 14 days; add them again to send a new one.
Sent one to the wrong address, or they're not joining after all? An owner or manager chooses Cancel invitation next to their email, then Cancel invitation in the box that opens to confirm, or Keep it to back out. Signing in with that email then won't add them, and any place it held on your plan is free again. If they signed in first, they're already on the team: remove them as below.

Change a role or remove someone#
Open Settings and go to Your team. It lists everyone on the team with their role. Owners and managers can change anyone's role except the owner's and their own:
Change their role
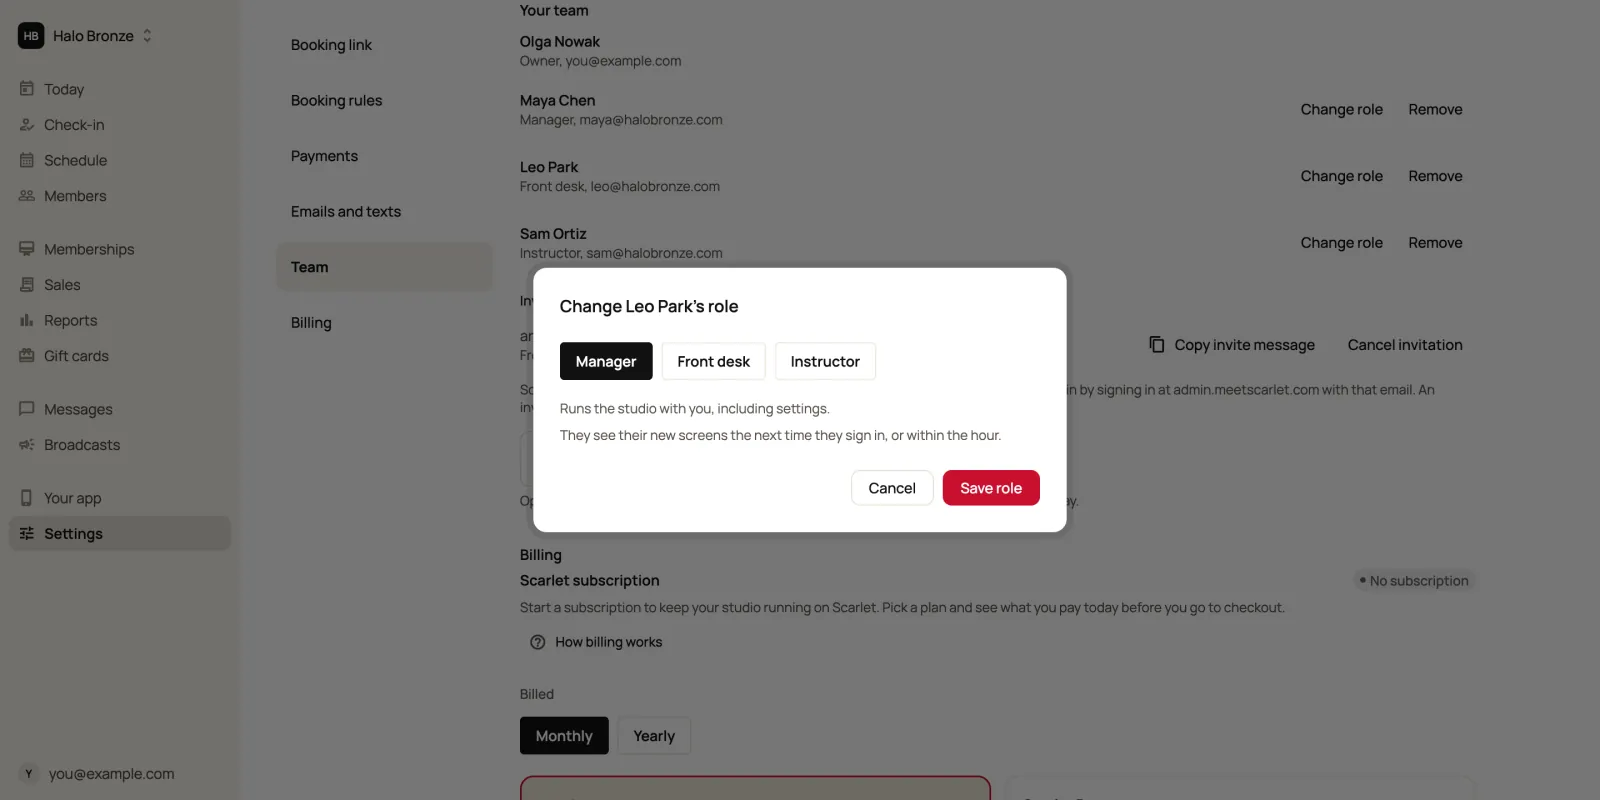
Choose Change role next to the person, pick the new role, then Save role. If the new role sees less, it takes effect at once and they're signed out shortly after. If it sees more, they get the new screens the next time they sign in, or within the hour.
Or remove them
Choose Remove, then Remove again to confirm. They lose access to your studio at once and are signed out shortly after. Their account isn't deleted, and what they did, such as classes taught and notes, stays on record. You can invite them again later.
If the person still has appointments booked with them, Scarlet lists those first. Choose Remove anyway to keep the appointments booked and marked Needs a new staff member, then move or cancel them from the Schedule. Nothing is moved, cancelled or charged on its own. To change the owner of a studio, contact Scarlet.
What each role can see#
| Role | For | Screens |
|---|---|---|
| Owner | You. The person who made the studio. | Everything, including the store keys for your app. |
| Manager | Runs the studio with you, including settings. | Everything except adding store keys and a few owner-only settings, which managers can see but not change. |
| Front desk | Runs the desk: members, check-in, plans, gift cards and messages. No settings, sales or reports. | Today, Check-in, Schedule, Members, Memberships, Gift cards and Messages. |
| Instructor | Teaching classes or seeing clients. | Today and Schedule. |
Reports, Sales, Broadcasts, Your app and Settings are for owners and managers only.
Two-step sign-in#
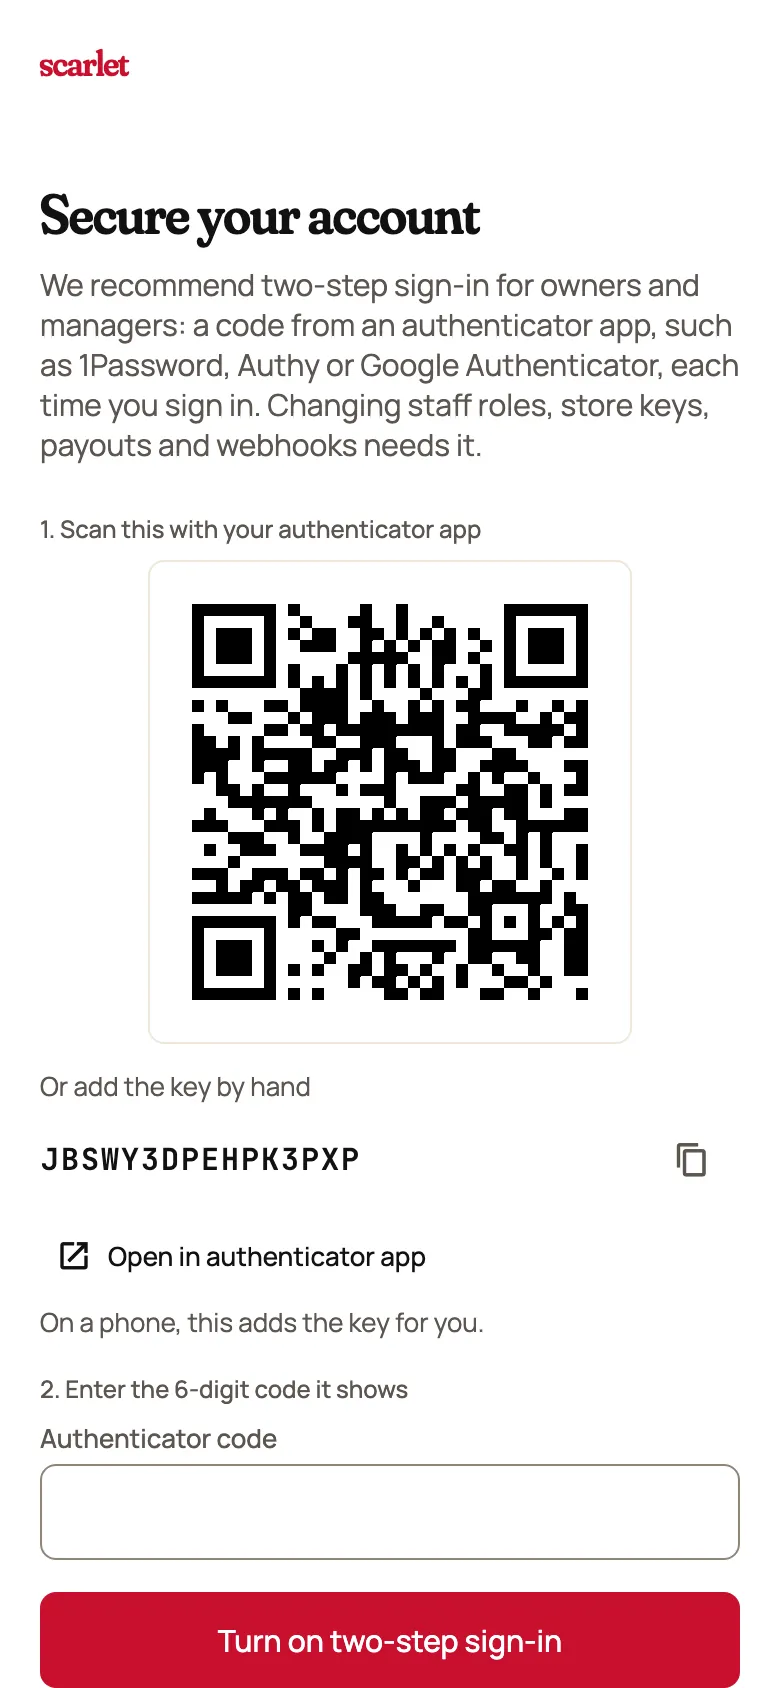
We recommend that owners and managers sign in with a second step (often called two-factor authentication, or 2FA): a 6-digit code from an authenticator app, such as 1Password, Authy or Google Authenticator. The admin offers to set it up straight after you create your studio, or the first time you sign in as an owner or manager. You can choose Skip for now; until it's on, a banner at the top of the admin has Turn it on, and so does Two-step sign-in in Settings.
A few actions need it, because they hand over money or control: changing a team member's role or removing them, inviting staff, adding store keys, connecting Stripe for payouts and bank details, webhooks, exporting members, connecting your own domain, and turning on the sign-in for App Store and Google Play reviewers. If you try one without it, the admin says so.
Start
Choose Set up authenticator app. If you signed in more than a few minutes ago, the admin first asks you to confirm it's you: enter your password and choose Confirm and continue, or, if you sign in with Google, choose Continue with Google. Setup then carries on.
Add Scarlet to your app
On a computer, scan the QR code with the authenticator app on your phone. On a phone, choose Open in authenticator app and the key goes straight in. You can also choose Copy key and type it into the app.
Enter the code
Type the 6-digit code your app shows, then choose Turn on two-step sign-in. If the code is refused, wait for the next one and try again. Then sign in again with your password and a code. If you were creating a new studio, setup opens where you left off. If you came from Connect domain or the store keys in Your app, it brings you back there, as long as you finish within the hour.
Can't sign in?#
- Forgot your password: choose Forgot? beside the password field on the sign-in page. See Sign in, or reset your password.
- Getting a new phone: move your authenticator app to it before you wipe or hand back the old one. Most apps, such as 1Password and Authy, can move or back up their codes.
- Lost the phone with your codes: nobody at your studio can switch two-step sign-in off for you, not even the owner. Email hello@meetscarlet.com from the address you sign in with, and we'll help you set it up again.
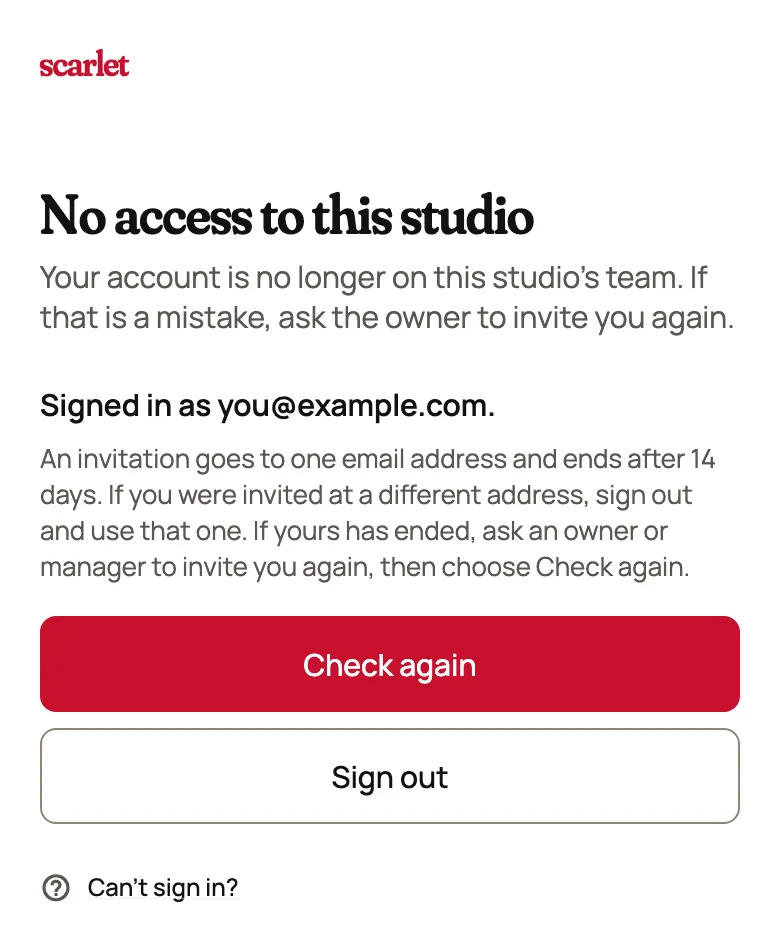
- Signed in, but your studio isn't there: if you were invited, choose Check for an invitation. Invitations end after 14 days, so ask an owner or manager to add you again if yours has. If you were on the team before, ask them whether you were removed or your role changed.
Still stuck?
Email hello@meetscarlet.com and tell us which guide you were on. A person reads every message.